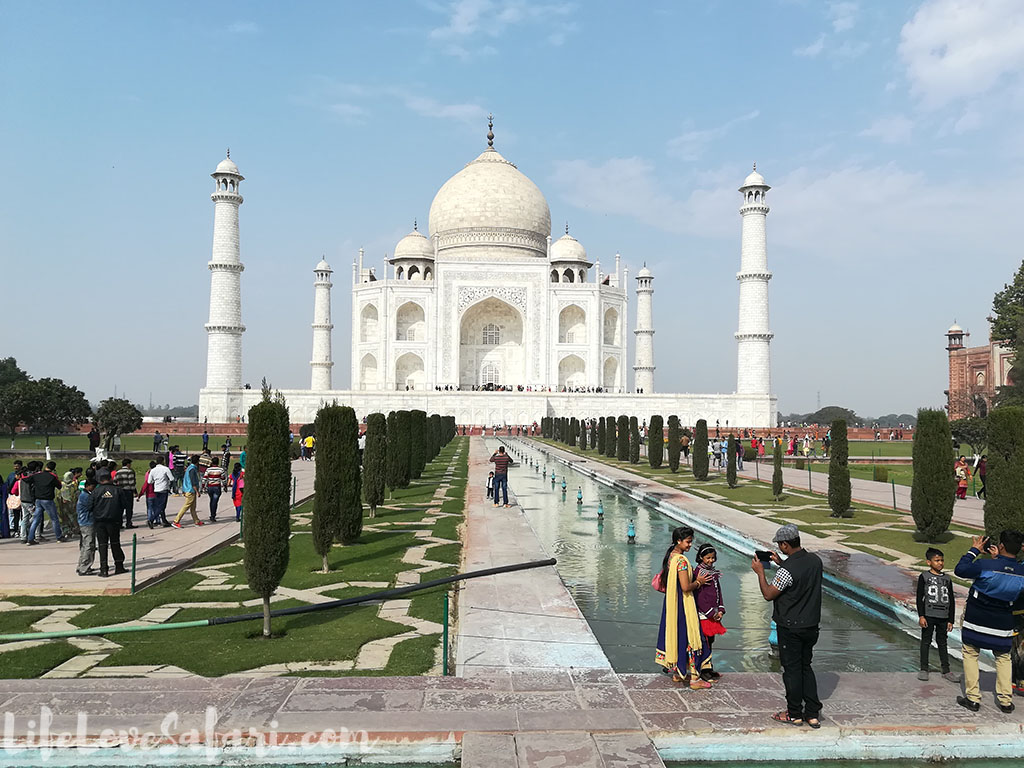
I travelled to India’s golden triangle last February 5 to 9. It is the beaten path which is composed of New Delhi which is the capital of India, Agra which is part of Uttar Pradesh State, and Jaipur which is the capital of the Rajasthan State. Before going to India, for ordinary Philippine passport holders like me, it is vital to apply for e-VISA to India. In this post, I will share the steps based on my experience and situation.
Update: As of August 10, 2018, the eVisa fee cost $80.
A. Photo and passport copy preparation.
Prepare a clear front-facing photograph with a light coloured background (e.g.: white). The photo format must be a jpeg. Its size must be a minimum of 10 KB and a maximum of 1 MB. The dimensions are minimum of 350 pixels by 350 pixels. You may use a photo editor to accomplish this.
The passport page with your personal details must be scanned and saved in pdf format. Its size must be a minimum of 10 KB and a maximum of 300 KB.

You may use MS Word and save it as a PDF file to comply with the 300KB maximum size requirement. Photo and passport requirements may change; please refer to the official site for any changes.
B. The eVisa application process.
Steps:
- Go to the Indian Visa Online website.
- Click eVisa on the left-hand side menu and then click e-Visa application.
- Type in the Passport type, Nationality, etc. Just like the image below:
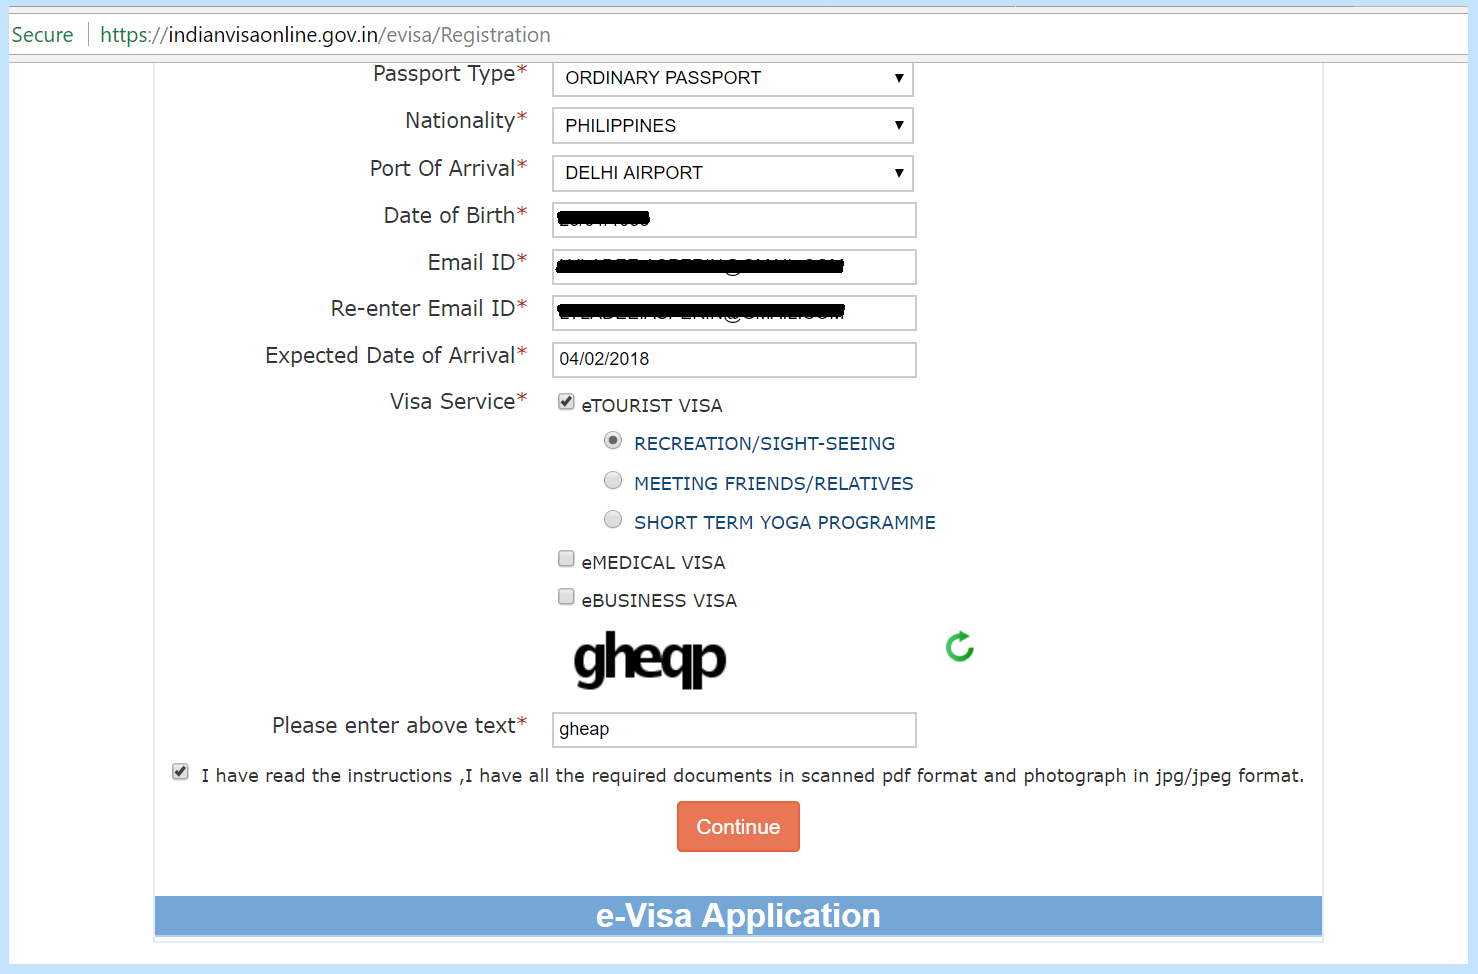
You may opt for the date which is one day before the arrival just in case your flight will be rescheduled. If you are travelling for tourism purposes, select e Tourist Visa and then the radio button for Recreation or Sight-seeing.
- Next step is filling in the Applicant’s details and Passport details. Questions like religion, educational qualification will be encountered. You must just read carefully and answer truthfully.
- The next page is about Applicant’s address, Family details, Professional background, and details of the eVisa. You will be asked what are the places you would like to visit. Then you will be asked to type in the countries you visited in the last 10 years. Then there is this part where you will be asked if you visited any SAARC countries during the last three years. You can search this on the Internet but in my case, I visited Sri Lanka in the past few months. You should be very careful and make sure you did not miss a single question.
- The next part is uploading the Photo and the Passport copy. This part will be accomplished quickly especially if you prepared the files before starting the application process. Then you will be asked to confirm the details. Should you need to Edit the entries, just double check again if you did not miss a single query before proceeding to the payment part. You must take note of the Application ID at this point and then proceed to the payment process. I paid $50.00 using my husband’s credit card. In case if I need future verification, I have prepared our Marriage Contract.
- After paying the $50.00, an email will be sent to the email address stated in the form. Make sure you check your Inbox and Junk folder if you did not get the email immediately. In the email, it will be stated that the application will take seventy-two hours for processing. At this point, you need to wait.
C. eVisa application, Approved.
I received the approved eVisa within 24 hours. If I will be travelling from February 5 to 9, 2018, it says that my first arrival in India should be between December 24th, 2017 to April 23rd, 2018. On presentation of ETA to the Immigration Officer on my first arrival, an e-Visa stamp (valid for 60 days from the date of the first arrival in India) would be endorsed on my passport.
D. Print the approved eVisa.
It is a must to carry a copy of the ETA at the time of the first arrival in India. You would be required to show the printed copy of the ETA to the Immigration Officer upon arrival in India.
E. Border Crossing experience.
My plane landed in New Delhi’s Indira Gandhi International Airport. After debarkation, I headed straight to immigration. An immigration officer instructed us to stand in line in the eVisa queue. When it was my turn, the officer looked for my arrival card, which I did not have! Then he gave me a small piece of paper, an arrival card to be filled out, and he asked me to go back to the queue. So I filled it out and came back to the officer’s desk. I gave my passport, eVisa, and the arrival card. He asked me where I wanted to go to India and if it was my first time in India. I answered the questions, and he stamped my passport with the visa stamp and the stamp for the date of arrival, and he let me go. Then there was another queue where you must open the page of your passport where the previous officer stamped the visa. The next officer after immigration desk will check the passport before finally letting you go to the arrival hall.